Lua
This information only applies to MySims Kingdom.
Check out the MySims version here.
MySims Kingdom uses Lua 5.1 as internal scripting, The scripts often attach to GameObjects, but there are some global classes too. Lua does not have engine access, only scripting capabilities and is therefore considered the 'front-end'.
Logging
To log messages, you can use MySims Modloader. The game features many
logging functions, which can be found in EA.lua:
| Function | Description |
|---|---|
EA:Log(class, ...) | Logs a message with the class name as prefix |
EA:LogI(class, ...) | Logs an info message |
EA:LogD(class, ...) | Logs a debug message |
EA:LogW(class, ...) | Logs a warning message |
EA:LogE(class, ...) | Logs an error message |
EA:LuaAssert(cond, msg) | Asserts a condition & logs an error if the condition is false |
print(...) | Default Lua print function |
The class parameter is a string that represents the class name, which is used as a prefix for the log message.
... is a variable number of arguments, which will be concatenated into a single string. Log messages will look like
this:
[2025-08-22 17:30:16] [LUA] (src\core\hooks\LuaHook.cpp:26) [Info] CharacterBase: NotRunnableCallback NPC_Gonk
Lua Loading
In MySims each Lua script loads dependencies with the require function. This means there is no centralized loading
system. MySims Kingdom extends this functionality with global loading files, which load all scripts in a specific order.
There are two global loading files:
SystemLoad.lua: Loads all system scripts (base classes and system functionality)GameplayLoad.lua: Loads all gameplay scripts (like GameObjects, cutscenes, UI, etc.)
Custom content can be loaded by adding a new script to any of these two files, depending on when it needs to be loaded. It is comparable to the load order in games like Skyrim or Fallout, where scripts are loaded in a specific order and scripts loaded later can override scripts loaded earlier.
Timing
The timing of when a script is loaded is important, as it determines when the script is executed and what it can
access. For example, if a script is loaded before the GameObjects are initialized, it cannot access any GameObjects
or their properties. The SystemLoad.lua file and its scripts are loaded first, followed by the GameplayLoad.lua
file and its content.
If you need to execute code before the game starts, you can use the function System:RegisterGeneralPostLoadInit(func).
This function registers a callback that will be executed after all SystemLoad.lua scripts have been loaded, but before
GameplayLoad.lua is parsed. This is useful for initializing global or system-wide functionality.
Classes
MySims Kingdom uses an object-oriented approach to Lua scripting, where classes are defined using tables and metatables.
The Class.lua file provides a base class implementation that allows for inheritance and method overriding.
All classes are saved in the global Classes table, which can be used to access any class by its name.
New classes can be created by calling Class:MakeGenericClass(parentClass, className) or with inheritance.
For example GameObjectBase.lua has an Inherit() function that allows you to create a new class that inherits from
the base class ("GameObjectBase" or any of its subclasses).
Classes can be made...
- immutable
System:MakeTableImmutable(Class)- no fields can be added or removed
- values of existing fields can be changed
- constant
System:MakeTableConst(Class)- no fields can be added or removed
- values of existing fields cannot be changed
With this knowledge, you can create your own classes and override existing methods of a class (if it is not constant).
Example: Adding new interactions
In this section, we will add a new interaction to the "Dresser" GameObject that makes the player sparkle. This will
demonstrate how to create a new class, override existing functionality with the help of the global Classes table and
load our new script.
Step 1: Creating a new class
We start by creating a new file (e.g. Dresser_Interaction_Sparkle.lua) and creating a new class for our interaction:
local Dresser_Interaction_Sparkle = Classes.Job_InteractionBase:Inherit("Dresser_Interaction_Sparkle")
This creates a new class that inherits from Job_InteractionBase, which is one of the two base classes for all
interactions (the other being Job_InteractionState for state-based interactions).
Step 2: Defining an interaction
From here we can continue with any variables our class may need and write our first method:
local Dresser_Interaction_Sparkle = Classes.Job_InteractionBase:Inherit("Dresser_Interaction_Sparkle")

Dresser_Interaction_Sparkle._instanceVars = -- instance variables are variables that are specific to each instance of the class
{
    bImABoolean = true, -- example variable
}

function Dresser_Interaction_Sparkle:Test( sim, obj, autonomous ) -- called before the interaction is performed to check if it can be performed
    -- get player
    local player = Universe:GetPlayerGameObject()

    if sim == player then -- only allow the player to perform the interaction
        return true
    end

    return false -- everyone else can't
end

function Dresser_Interaction_Sparkle:Destructor() -- called when the interaction is no longer being performed
    -- cleanup code if needed
end

function Dresser_Interaction_Sparkle:Action( sim, obj ) -- called when the interaction is performed
    -- do something
end
_instanceVars can be used to define variables that are specific to each instance of the class, these variables can be
accessed with the keyword self in methods (like self.bImABoolean = false).
The Test() method is called to check if the interaction can be performed. It takes three parameters:
sim: The Sim that is trying to perform the interactionobj: The GameObject that the interaction is being performed on (in this case, the Dresser)- Note: This can also be another Sim for interactions that are performed on other Sims (e.g. "Be mean")
autonomous: A boolean indicating if the interaction is being performed autonomously (barely used, can be ignored)
In this case, we check if the Player is the Sim trying to perform the interaction on this GameObject (the Dresser).
We return true if the Sim can perform the interaction, otherwise false.
We have two more methods. The Destructor() method is called when the interaction is no longer being performed, it can
be used to "clean up" (like removing effects, resetting positions, etc.). The Action() method is called when the
interaction is performed, it takes the same parameters as Test() and is the core functionality of the interaction.
Let's add some functionality to the Action() method:
function Dresser_Interaction_Sparkle:Action( sim, obj )
    -- get the players position and rotation
    local x, y, z, rotY = sim:GetPositionRotation()

    -- setup the sparkle effect
    local override =
    {
        LifetimeInSeconds = 4.0, -- how long the effect lasts
        EffectName = "sim-magicTransport-start-effects", -- name of the effect
        EffectPriority = FXPriority.High, -- priority of the effect
    }

    -- spawn the sparkle effect at the player's position
    -- Job_SpawnObject:Spawn() params: class, collection, parent, x, y, z, rotation, overrideTable
    local spawnJob = Classes.Job_SpawnObject:Spawn("effect", "default", Universe:GetWorld(), x, y, z, rotY, override)
    spawnJob:Execute(self)

    -- play the clap happy animation on the performing Sim (the player in this case)
    -- Job_InteractionBase:PlayAnimationBlocking() params: sim, animationName, loopCount
    local result, reason = self:PlayAnimationBlocking( sim, "a-react-clapHappy", 1 )
end
In this code, we first get the player's position and rotation, then we set up the sparkle effect with a lifetime of 4
seconds and the effect name. We then spawn the effect at the player's position using the Job_SpawnObject:Spawn()
method, which takes the class, collection, parent, position and rotation, and an override table as parameters.
Finally, we play the "clap happy" animation using the Job_InteractionBase:PlayAnimationBlocking() method, which takes
the Sim, animation name and loop count as parameters. The PlayAnimationBlocking() method will "block" the player
until the animation is finished.
Step 3: Loading a script
To load our new script, we need to add it to the GameplayLoad.lua file. Open the file and add the following line at
the end of the file:
require "Dresser_Interaction_Sparkle"
You can add your scripts anywhere in the file. Both SystemLoad.lua and GameplayLoad.lua are
load orders and your new script will be loaded when and where you add it.
For overrides, it is recommended to add them at the end of the file, so they are never loaded before the original script.
This will load our new script last when the game starts, but we are still not able to use it in the game. The Dresser GameObject needs to be modified to use our new interaction.
Step 4: Adding a new interaction to a GameObject
We could modify Dresser.lua directly and add our new interaction there, but this can quickly cause conflicts with
other mods. Instead, we will create a new file (or add our Dresser override to our Dresser_Interaction_Sparkle.lua
file).
Classes.Dresser.interactionSet.Sparkle = {
    name = "Sparkle",
    interactionClassName = "Dresser_Interaction_Sparkle",
    menu_priority = 2,
    icon = "uitexture-interest-elegant",
}
First we need to access the Dresser GameObject class, which is stored in the global Classes table. We do this by
using Classes.Dresser.
Since all interactions are stored in the interactionSet table for each GameObject, we can add our new interaction
by creating a new entry in the interactionSet table (Classes.Dresser.interactionSet.Sparkle).
From here we can set the properties of our new "Sparkle" interaction:
name: The name of the interaction, which will be displayed in the UIinteractionClassName: The name of the class that we created earlier (Dresser_Interaction_Sparkle)menu_priority: The priority of the interaction in the menu, lower values are displayed firsticon: The icon that will be displayed in the UI for the interaction
Step 5: Testing & Conclusion
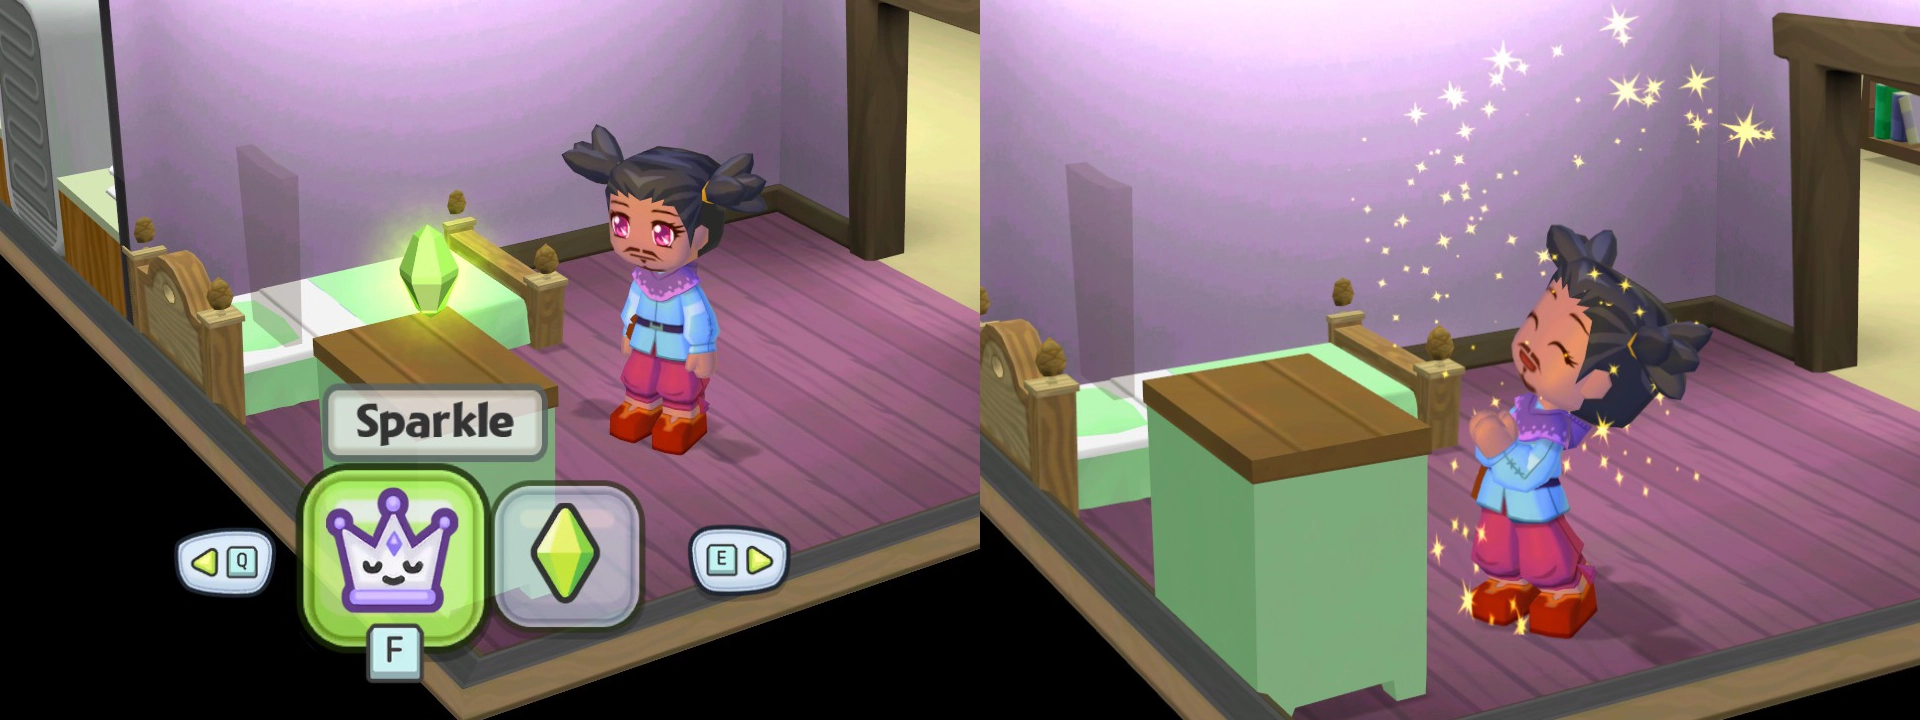
Now we can start the game and test our new interaction. If everything is set up correctly, we should be able to perform the "Sparkle" interaction on the Dresser GameObject, which will play the clap happy animation and spawn the sparkle effect at the player's position.
With overrides we can prevent conflicts with other mods. However, currently each mod needs to be added to the
GameplayLoad.lua or SystemLoad.lua file. This means there may still be conflicts if two mods
include their own version of the loading files.